As cyberattacks become more sophisticated and frequent, one built-in security solution quietly stands guard on every Windows PC — Microsoft Defender Antivirus, formerly known as Windows Defender.
While many users rush to install third-party antivirus programs, few realize how far Microsoft’s own solution has come. In recent years, Defender has evolved into a complete security suite, capable of protecting your device against malware, phishing, ransomware, spyware, and even advanced zero-day attacks. It operates quietly in the background, updates automatically, and integrates deeply with Windows 10 and Windows 11 to deliver real-time, cloud-based protection — all without slowing down your system.
What makes Defender truly powerful isn’t just its detection rate — it’s how customizable and intelligent it has become. With the right setup, it can easily compete with, or even outperform, many paid antivirus solutions. But most users never take full advantage of its capabilities.
That’s exactly what this guide will help you change.
In this article — and in the accompanying podcast episode — I’ll share practical, field-tested tips to unlock the full potential of Windows Defender. Whether you’re a casual home user, a freelancer managing sensitive data, or a small business owner protecting multiple PCs, these steps will help you strengthen your cybersecurity without adding extra software or complexity.
1. Keep Windows and Defender Updated
One of the most overlooked aspects of strong cybersecurity is also the simplest: regular updates. Many users click “Remind me later” when Windows prompts them to install updates — but in doing so, they unknowingly leave critical security gaps open.
Microsoft’s security updates are not just about fixing visual bugs or improving performance. They often include patches for newly discovered vulnerabilities, updated virus definitions, and improved threat detection algorithms for Microsoft Defender. Cybercriminals actively exploit outdated systems because they know exactly which weaknesses to target.
By keeping Windows and Defender up to date, you ensure that your system is always equipped with the latest protection intelligence, making it far harder for attackers to compromise your device.
➡️ How to do it:
-
Open Settings → Windows Update → Check for updates.
-
Enable Automatic Updates to let Windows handle new patches in the background.
-
Restart your PC after major updates — some security components only activate after reboot.
-
For laptops, make sure updates are allowed on battery power if you’re often on the go.
Pro Tip:
You can also type “Windows Security → Virus & threat protection → Protection updates” to manually download the latest Defender definitions if you haven’t restarted or updated recently.
Keeping your system updated might feel routine, but it’s one of the strongest shields against modern cyber threats — and it takes less than a minute to maintain.
2. Enable Real-Time Protection
Real-time protection is the heart of Microsoft Defender — it’s what constantly monitors your system for threats as you browse, download, or open files. Think of it as your PC’s active immune system: always running in the background, identifying suspicious behavior, and stopping malware before it can cause damage.
If this feature is turned off, even for a short period, your system becomes vulnerable. Malware can slip in through a single infected email attachment, USB drive, or unsafe download — and by the time you manually run a scan, it might already have executed harmful actions.
That’s why real-time protection should never be disabled, not even temporarily to “speed things up” or install software from unverified sources. Modern versions of Windows 11 handle real-time scanning efficiently, meaning performance impact is minimal on any modern device.
➡️ How to check and enable it:
-
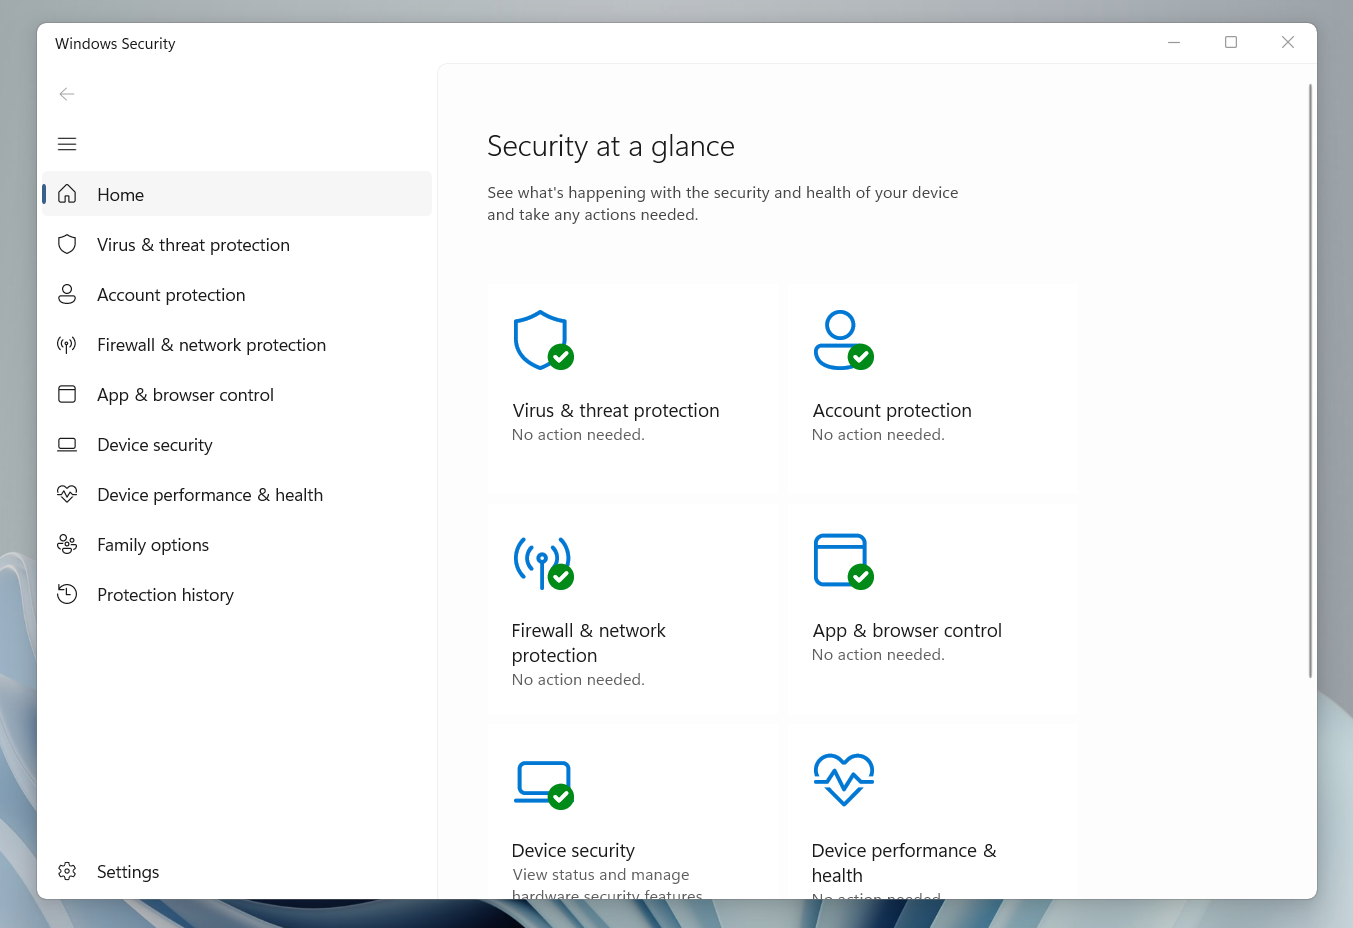
Go to Settings → Privacy & Security → Windows Security → Virus & threat protection.
-
Click Manage settings under Virus & threat protection settings.
-
Ensure “Real-time protection” is switched On.
-
If Defender notifies you that protection is off, select “Turn on” immediately.
Pro Tip:
If you use specialized tools or heavy creative software that temporarily trigger false positives, add them as trusted exclusions instead of disabling protection completely. You can do this under Exclusions → Add or remove exclusions.
Keeping real-time protection active 24/7 ensures Defender reacts instantly to potential threats — before they spread, encrypt files, or compromise your credentials. It’s your first and most responsive layer of defense.
3. Use Controlled Folder Access
One of the most dangerous and fast-growing cyber threats today is ransomware — malicious software that encrypts your personal or business files and demands payment for their release. Even careful users can fall victim through a single infected email attachment, phishing link, or fake software update.
Microsoft Defender includes a powerful built-in feature to fight this: Controlled Folder Access. It acts like a digital bodyguard for your most valuable folders — such as Documents, Pictures, Videos, or any folder you manually add. When enabled, it prevents untrusted or suspicious apps from making changes, deleting files, or encrypting data in those protected locations.
With this feature turned on, even if ransomware somehow runs on your system, it will be blocked from touching your critical data.
➡️ How to enable it:
-
Open Windows Security → Virus & threat protection → Ransomware protection.
-
Click Manage ransomware protection.
-
Turn on Controlled folder access.
-
Add any additional folders you want to protect (for example, work project folders or cloud sync directories).
-
If a trusted app — such as Adobe Photoshop or your backup software — is blocked, go to “Allow an app through Controlled folder access” and add it manually.
Pro Tip:
Combine Controlled Folder Access with OneDrive Backup or another secure cloud solution. That way, even if something slips through, you’ll still have clean copies of your important files.
Controlled Folder Access is an often-ignored feature, but it’s one of the most effective defenses against ransomware. Once enabled, it silently protects your personal data in the background — no configuration required, just reliable peace of mind.
4. Schedule Regular Full Scans
While Microsoft Defender continuously monitors your system in the background, no real-time protection is perfect. Some threats can hide inside compressed files, unused software folders, or external drives that aren’t always connected. That’s why running a full system scan on a regular schedule is a smart layer of defense — it ensures that anything overlooked or dormant gets detected before it can activate.
Quick scans are useful for daily safety checks, but they only review the most common infection points. A weekly full scan digs deeper into every file and directory, uncovering hidden malware, trojans, or unwanted programs that may have slipped through.
➡️ How to schedule a full scan automatically:
-
Press Windows + S and type Task Scheduler, then open it.
-
Select Create Basic Task and name it something like Weekly Defender Scan.
-
Choose your preferred schedule — for example, every Sunday at 9 AM when your PC is usually idle.
-
In the Action step, select Start a Program and enter the following command:
(ScanType 2 triggers a complete system scan.)
-
Finish the setup and ensure the task is allowed to run even if you’re not logged in.
Pro Tip:
Run a manual full scan right after major Windows updates or after installing new software. You can also use PowerShell or Command Prompt with the same command if you prefer to trigger scans manually.
By scheduling automated full scans, you guarantee that Defender regularly reviews every corner of your system — even when you forget. It’s a simple routine that keeps your device one step ahead of evolving threats.
5. Review the Protection History
Even the strongest security tools are most effective when you understand what they’re doing. Microsoft Defender quietly works in the background — detecting, blocking, and quarantining threats — but it also keeps a detailed record of its activity. This record, known as the Protection History, gives you full transparency over what has been detected, when it happened, and how the system responded.
Regularly checking this log helps you spot patterns, identify recurring threats, and confirm that Defender is working as expected. It’s also useful for detecting false positives — legitimate files that Defender might have flagged by mistake.
➡️ How to access it:
-
Open Windows Security → Virus & threat protection.
-
Scroll down and select Protection history.
-
Review the list of recent actions, such as “Threat quarantined”, “Blocked behavior”, or “Unauthorized change prevented”.
-
Click on an individual item for more details, including file path, threat name, and recommended actions.
If you notice the same threat appearing multiple times — for example, a recurring detection of Trojan:Script/Wacatac.B!ml — it may indicate that a program or browser extension keeps reintroducing the infection. In that case, it’s time to run a full scan, remove suspicious apps, or use Defender Offline Scan (see Section 9).
Pro Tip:
You can also export Defender logs using PowerShell for deeper analysis — ideal if you manage multiple systems or want to review patterns over time. Use this command:
It provides a full report of recent detections and their status.
Regularly reviewing your Protection History ensures you’re not just protected — you’re informed. It’s a simple habit that turns Windows Defender from a background tool into a transparent, trustworthy security partner.
6. Combine Defender with SmartScreen
SmartScreen filters malicious websites, downloads, and phishing links in Edge and other Microsoft apps.
➡️ Check:
Open Windows Security → App & browser control → Reputation-based protection settings.
Enable all SmartScreen options.
7. Turn on Tamper Protection
One of the first things many advanced malware strains try to do after infecting a system is disable your antivirus.
Attackers know that if they can shut down Windows Defender or change its core settings, they can operate freely — encrypting data, installing backdoors, or stealing credentials without being detected.
That’s where Tamper Protection comes in. This feature acts as a lock on your Defender settings, preventing unauthorized apps, scripts, or even administrative users from turning off key security functions. Once activated, no process — not even one running with admin privileges — can silently modify Defender’s real-time protection, cloud protection, or behavior monitoring.
In practice, this means that even if malware somehow gains access to your system, it cannot disable Defender or change its configuration. Tamper Protection keeps your defenses intact, no matter what’s happening in the background.
➡️ How to enable it:
-
Open Windows Security → Virus & threat protection.
-
Click Manage settings under Virus & threat protection settings.
-
Scroll down and switch Tamper Protection to On.
Example:
Some ransomware variants attempt to modify registry keys that control antivirus behavior. With Tamper Protection on, those registry edits are instantly blocked — your Defender stays active and locked down.
Pro Tip:
Tamper Protection is especially important for users who install multiple security tools, optimization apps, or PowerShell scripts. These can sometimes unintentionally alter Defender settings — but with Tamper Protection enabled, those changes are automatically rejected.
Tamper Protection is a small toggle with huge impact. Once enabled, it ensures that no attacker — or even well-meaning software — can weaken your defenses. In cybersecurity terms, it’s your digital padlock against tampering and manipulation.
8. Integrate Cloud-Delivered Protection
Cyber threats evolve faster than any single computer can keep up with — new malware variants appear daily, often before antivirus databases can even recognize them. To stay ahead of this rapid evolution, Microsoft Defender uses cloud-delivered protection, a real-time intelligence system powered by Microsoft’s global threat-detection network.
This feature connects your Defender to Microsoft’s security cloud, where millions of anonymized data points from users, businesses, and enterprise networks are analyzed every second. When Defender encounters a suspicious file or behavior, it quickly compares it against this massive online database. If a match or pattern is found, the file is blocked within milliseconds, even if no traditional virus definition exists yet.
That’s how Defender detects zero-day attacks — threats so new that they haven’t been officially classified yet. Cloud-delivered protection gives you the benefit of enterprise-level intelligence without needing any additional software or configuration.
➡️ How to enable it:
-
Open Windows Security → Virus & threat protection → Manage settings.
-
Turn on Cloud-delivered protection.
-
Also enable Automatic sample submission — this allows Defender to securely send suspicious files to Microsoft for deeper analysis (without exposing personal data).
Example:
You download a new game installer from an unfamiliar website. Before it even runs, Defender checks the file’s hash signature against Microsoft’s cloud. If the file matches a pattern known to distribute adware or trojans, it’s instantly blocked — long before it can cause damage.
Pro Tip:
Cloud-delivered protection works best with a stable internet connection. For laptops or remote setups, make sure it remains active even when you’re on Wi-Fi or mobile networks.
By integrating cloud-delivered protection, you’re effectively turning your PC into part of a global defense network — one that learns, adapts, and responds to threats faster than any standalone antivirus ever could.
9. Use Microsoft Defender Offline Scan
Some forms of malware are designed to be invisible while Windows is running. These advanced threats — including rootkits and deeply embedded trojans — load before the operating system starts or hide within system processes, making them difficult for standard antivirus scans to detect or remove.
That’s where Microsoft Defender Offline Scan becomes a powerful last resort. It reboots your PC and launches a specialized version of Defender outside of Windows, allowing it to scan the system at a deeper level. Because the malware isn’t active during this process, Defender can detect and eliminate infections that would otherwise go unnoticed.
This type of scan is particularly useful if you experience unusual behavior such as:
-
Your antivirus keeps detecting the same threat repeatedly.
-
System performance drops drastically without clear reason.
-
Pop-ups or unwanted programs reappear after removal.
-
You suspect tampering or persistent root-level infections.
➡️ How to run an Offline Scan:
-
Open Windows Security → Virus & threat protection.
-
Under Current threats, select Scan options.
-
Choose Microsoft Defender Offline scan and click Scan now.
-
Save any open work — your PC will restart and perform the scan automatically.
-
After the scan completes, Windows will restart normally, and you can review the results in Protection history.
Example:
If you’ve removed a trojan but Defender continues to alert you about it after every reboot, running an Offline Scan can root it out completely — scanning before the malware has a chance to start up.
Pro Tip:
Run an Offline Scan once every few months or anytime you suspect a deep infection. It’s also wise to perform one after removing persistent adware or suspicious browser hijackers.
Microsoft Defender Offline Scan is your deep-cleaning tool — not for everyday use, but invaluable when regular scans can’t reach the root of the problem. It ensures that even hidden or system-level malware has nowhere left to hide.
10. Don’t Forget the Human Element
Even with every security feature enabled and all the latest updates installed, the greatest vulnerability in any system is still human behavior. Most cyberattacks don’t rely on complex hacking techniques — they exploit curiosity, trust, or lack of awareness.
A single careless click on a phishing email, a weak password reused across accounts, or downloading a “free” tool from an unknown source can instantly undo all of your system’s built-in protection. That’s why true cybersecurity isn’t just about software — it’s about mindset and habit.
Here’s how to strengthen your “human firewall”:
-
Pause before clicking: Always verify links, especially in emails or text messages that create a sense of urgency.
-
Check sender details: Look for subtle misspellings or suspicious domains (for example, micr0soft-support.com instead of microsoft.com).
-
Use strong, unique passwords: Combine length with complexity, or better yet, use a password manager.
-
Be careful with USB drives and downloads: Malware often spreads through infected external devices or pirated software.
-
Stay informed: Read cybersecurity blogs (like this one), listen to podcasts, and keep learning — awareness is the strongest protection.
Example:
In many ransomware cases, the infection began with a fake “shipping invoice” email. The user opened the attachment without verifying the sender, and within minutes, the files were encrypted. Defender can stop many attacks — but not the ones we invite ourselves.
Pro Tip:
Adopt the mindset of “trust but verify.” When something feels slightly off — an unexpected pop-up, a too-good-to-be-true offer, or a message asking for your password — stop and double-check before taking action.
Cybersecurity starts with technology, but it succeeds with people.
By staying alert, practicing good habits, and using the full power of Microsoft Defender, you build a layered defense that’s stronger than any antivirus alone.
Conclusion – The 10 Best Tips for Windows Defender
Microsoft Defender has come a long way — from a simple antivirus tool to a powerful, all-in-one protection system that now rivals paid solutions. With the right configuration, it can safeguard your data, detect modern threats in real time, and keep your Windows device running safely and efficiently.
The ten tips you’ve just learned are not about adding complexity — they’re about using what’s already built into your system smarter and more effectively. Each feature, from Controlled Folder Access to Tamper Protection, plays a key role in building a layered defense that keeps your personal and professional data secure.
But remember — cybersecurity isn’t a one-time setup. It’s a continuous mindset. Keeping your system updated, reviewing Defender’s reports, and staying alert to social engineering tactics are habits that will protect you long-term.
Please also read:
Optimally setting up Windows Defender: Complete guide
Windows Defender for Business vs ESET PROTECT Business Comparison Guide
Follow me on Facebook or Tumblr to stay up to date
Connect with me on LinkedIn
Take a look at my services
And for even more valuable tips, sign up for my newsletter